Hello, world!
So you see, I've got very, well, strange skin. My T-zone is oily, but my chin and the sides of my nose are constantly red and irritated. This face mask is definitely better for people with oily skin, so if you have skin like mine, leave it only on trouble spots. The vinegar in this is a serious astringent, so it basically sucks the oil and moisture out of your face, making it a clean slate. The cornstarch is there mostly as a binder for the vinegar to make a paste. This was a good face mask, but I would definitely not repeat it more than once a week.
Step 1:
Grab a small bowl, preferably a thick plastic or metal, and starting with cornstarch, place about 1 TBS of cornstarch in the bowl. Slowly add the vinegar, about 1/4 of a tsp at a time until the mixture is a thick paste.
Step 2:
Don't wash your face first! Make sure that your skin is nasty enough so that the mask doesn't take ALL the oil out of your skin. I left it on my face for 30 minutes: BIG MISTAKE, ladies, big mistake. It made my skin super dry, so when I tried it again for only 15 minutes, it was far less harmful. Wash your face off with warm water, then splash your face with cold water to close your sensitive, open pores. After 10 minutes, apply a light coat of your favorite moisturizer. If your skin feels tight afterward, don't worry, it's natural.
Hello, world!
I ran across a great nutmeg face mask while on Pinterest the other day, (Psssst,share this blog there!) After I tried it out, my face felt clean, my pores were breathing, and scars will be noticeably lightened if you keep at it. As usual, the honey is a great disinfectant, while the milk is soothing and the nutmeg is perfectly textured. Also, please comment! I love seeing how these masks work for other people, so let me know how it went! I loved this mask, and I hope you like it, too. Enjoy!
Source: www.hudabeauty.com
 I used plain ground nutmeg, if you want, feel free to grind your own. Fresh ground works just as well, but I prefer the already ground kind.
Step 1:
In a small bowl, combine following ingredients:
2 TBS honey
2 TBS nutmeg
2 tsp milk
Mix well with a small whisk, spoon, or small spatula. Make sure the nutmeg and honey are well incorporated, or they will separate later and get nasty.
Step 2:
Was skin with a gentle cleanser. I always prefer Cetaphil, just because it washes your skin really well, but doesn't dry out or overly moisturize. I left it on my skin for 15 minutes, and that was definitely long enough. I washed off with warm water, and after 10 minutes, followed with a light, oil-free moisturizer. Enjoy!
Hello, blogosphere!
This is my first official post as The Pampered Prep, and I can't wait to share this great face mask with you! It is super easy, and if you can't find all these ingredients at home, any grocery store will have them. The lemon juice and egg white in this mask helps dry out any excess oils in your skin, while the yogurt and honey help to nourish and moisturize your face. This facial is really effective, and very good for people with oily skin, and if you have sensitive skin, like me, then cut back the lemon juice to about 2 1/2 or 3 tablespoons. I'd love to hear your reactions to this mask! If your skin is feeling dull, I even added 3 uncoated plain aspirin diluted in a tablespoon of water. This facial can be used around 1 to 2 times a week. I'd love to hear your reactions to this mask!
Credit: www.theberry.com
Step 1:
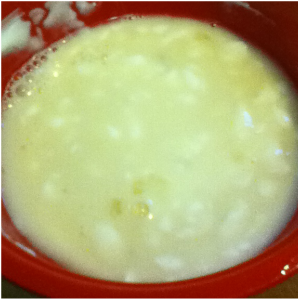
In a small bowl, I combined all the ingredients in order:
4 tsp lemon juice (or three for sensitive skin!)
3 tsp plain yogurt (I used Fage)
4 TBS honey
1 egg white
Step 2:
Using a fork, I stirred and whisked the mixture until it was well blended. After washing my face, (I recommend using Cetaphil or another gentle cleanser,) I spread the mask over my face using my fingers. At first I was skeptical of rubbing raw egg on my face, but my mind flashed back to the cookie dough this morning... so I just went ahead!
Step 3:
Kick back! It only takes 15 minutes for this mask to work its magic, so start your favorite show or read a magazine, or if you're in the mood, take a quick nap! After the timer beeped, I rinsed my face off with warm water. Don't use face wash! Using warm water will help open up your pores, so keep your hands off your face for a while to prevent any gross dirt and grime from clogging them back up. Enjoy your soft, clean skin!
This is what your mask should look like when it's all mixed up. If it doesn't don't worry. Roll with it!
Hello, world!
Because of this blog, I've had to try every single face mask before I tell you about it. My face obviously took it personally, causing redness and irritation. So, I flipped open my handy notebook and found a moisturizing mask! The oatmeal helped sooth my skin, and the milk helped reduce redness while the honey very gently cleansed my skin. This mask was AMAZING, especially because my sensitive basically soaked up the moisture. All irritation was gone, and the redness was considerably lessened afterwards. Though it is wonderful for all skin types, oily skin might find that it adds too much moisture to skin that is not irritated.
Credit to: www.somewhatsimple.com
Step 1:
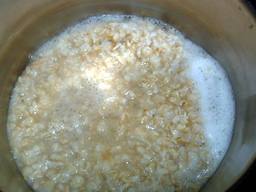
In a small saucepan, cook:
1/2 cup uncooked oatmeal
1/2 cup water
1/2 cup milk
1 TBS honey + extra
over medium heat until combined, like regular breakfast oatmeal. Leave on heat for 5 to 6 minutes, stirring occasionally with spatula.
Step 2:
Remove saucepan from heat, and let it cool until it is comfortable to leave on skin. Using the extra honey, massage a thick layer of it over clean face before applying mask. Leave for 10 to 15 minutes, and wash off with warm water. Your skin should feel clean and soothed. Enjoy!
|

 RSS Feed