Hello, world!
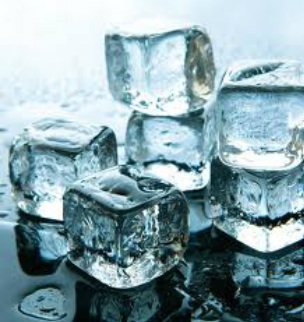
I know, I know, I have been pretty distant in the last few weeks, but alas, I returned, and with a few great tips that will have you looking alive and fresh, and guess what? It only takes a few minutes! All with one simple ingredient: ice! The chilly molecules will perk up your skin, and help shrink blemishes quickly and easily. Enjoy, send comments, stay fresh!
Tip 1: Skin Wake-up!
On chilly mornings when I have to get out of bed, I am entirely unmotivated. And that's what my skin looks like, too. Luckily, all I have to do is run down to the freezer and snag an ice cube. Holding the cube in your hands, gently massage your face with the ice to stimulate the nerves in your face, giving you a healthy, rosy glow. Pat your face dry with a clean washcloth, and feel like a million bucks!
Tip 2: Blemish Shrinking!
Oh no! It's your big day, i.e.; graduation, birthday, big party, and you've suddenly got a mountain on your forehead! Have no fear! Quickly wash your face with a mild cleanser, like Cetaphil, and warm water, not too hot. Grab a clean washcloth, and pat your face dry. Fold the towel up into a medium-sized square, and run it under hot water for a few seconds so it absorbs enough water. Press this to your blemish for 3 to 5 minutes, pressing gently. After the time is up, grab your ice cube, and do the same thing as with the heat: press gently against the blemish for 3 to 5 minutes, and once you have accomplished this, spray on a toner to absorb any leftover face wash (I recommend an all natural toner, like green tea.)
Tip 3: Eye De-puffer!
After a rough night, your eyes can look puffy and extremely unhappy, which is especially bad when it's a big day, full of early morning meetings or an early class. But don't worry, your solution is steps away, in your freezer! While a healthy slice of bread is toasting in the toaster, grab to ice cubes, lie down, and let them rest over your closed lids. Once your toast is done, or approximately two to three minutes, throw the cubes in the sink, and enjoy your bright-eyed and bush-tailed self!
Hello, world!
I know, I know, i just posted a lip scrub recipe, but this is lip balm, so you can do both! As I said before, this cold winter weather has been HORRENDOUS for my lips, and my family and friends know that without chapstick, I am a train wreck for the rest of the day. It's true; I have problem. Anywho, I found a crazy easy recipe for one that anyone can make, and it works really well, too! Also, it's only four ingredients! I used a bunch of little containers for mine, so that I could just stash them in pockets and purses, but you should use something like an empty Altoid's container or two for storage. Enjoy, send comments, stay fresh!
Source: http://www.stylemepretty.com/living/2013/05/14/diy-lip-balm/
Step 1:
In a microwavable bowl, combine 1 TBS shaved beeswax, 4 TBS coconut oil, 3 TBS shea butter, (or petroleum jelly, if you're in a pinch!) and heat in microwave for 1 minute. Stir in a bit of Kool-Aid powder, about 1/4 teaspoon at a time until you reach your desired color.
Step 2:
Once you are happy with the color, use a dropper or spoon to pour the mixture into your container. Pop the container in the fridge for 1 to 2 hours, and then enjoy your smooth, silky lips!
Hello, world!
This cold weather has been brutal on my lips, so I found a great recipe that is perfect for scrubbing off the dry skin and ickiness of winter. It is super easy and quick to make, even when you only have ten minutes. Enjoy, send comments, stay fresh!
Source: www.hercampus.com
Step 1:
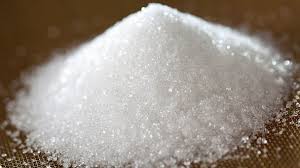
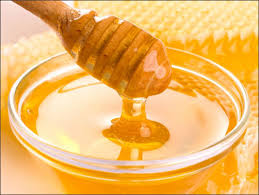
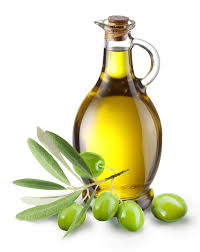
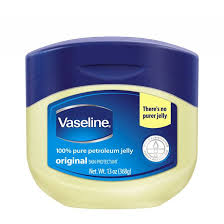
In a small bowl, combine 2 TBS brown sugar, 1 TBS honey, 1 tsp olive oil, and 1 tsp vaseline until you have a thick scrub. If you want, add 1-3 drops of food coloring. I went with a vibrant pink. Store in an airtight container with a lid.
Step 2:
To use this scub, rub a small amount onto your lips. Once you have massaged the mixture in for about 30 seconds, rinse off with warm water. Follow with lip balm. Enjoy your soft
Hello, world!
Lately, the strange weather where I'm from has caused my skin to go from oily, to dry, to oily again. This has caused major breakouts, especially on my forehead. While surfing an amazing blog, Crunchy Betty, I found this overnight blemish reducer. It worked really well, and when I woke up, my disfigurement was drastically reduced and less inflamed. Enjoy, send comments, stay fresh! FYI: I thought I would try something new, so if you tell me your skin type/problem, I would be happy to help you find a great, easy, at home solution.
Source: www.crunchybetty.com

This pensive looking woman represents you. Stop touching your face!
Step 1:
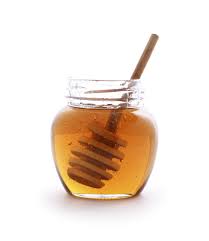
Wash your face with a mild cleanser, avoiding rubbing your trouble spots. Pushing on them too hard will force the bacteria deeper into your skin, making it stay there far longer than you want. Now grab what you need: pure honey, and a plain Band-Aid.
Step 2:
On the Band-Aid, spread a drop of honey all over the cotton pad pad. Apply the bandage onto your skin with the honey entirely covering the blemish. Now, go to bed! After you have gotten in your eight hours, peel the bandage off (ouch, I know) and rinse off your whole face with a mild cleanser. Repeat nightly if you are still unhappy. Enjoy!
Hello, world!
I am back to the blog after my four day hiatus (the horror!) and I have found the perfect recipe for the job. As you know, my face is constantly being the guinea pig for what I post on here, and after all those oil stripping masks and drying, my sensitive skin just can't handle the harsh chemicals in store bought facial toners, especially ones with any kind of alcohol in them. Luckily, I found this! It is literally just green tea, but it works wonders! My skin feels fresh, clean, and amazing after a quick spritz of this. Enjoy, leave comments, stay fresh, and remember the heroes and victims of this day's anniversary.
Source: http://everydayroots.com/acne-remedies
Step 1:
Boil 1 cup of filtered water, or rose water, if you have it. Once it has reached boiling point, remove it from the heat and pour it into a glass measuring cup with two bags of green tea, or any loose leaf black tea. I recommend using bagged green tea, because it is easier to strain. Let it steep for 5 minutes, and then remove tea bags or strain leaves.
Step 2:
Pour tea, once it has cooled to room temperature, into an empty plastic spray bottle. I used a small bottle, but kept the leftovers for refilling. So, for those of you who are newbies to toner, here's the skinny, Jimmy: After washing your face, pat it dry with a soft towel. Using a spray bottle or cotton ball/pad, pat on a few squirts of the toner to help even skin tone, remove any excess face wash or grime, and close pores. I keep mine in the fridge so that I can have a nice refreshing mist in the morning and before bed. Enjoy!
Hello, world!
I know, I may still be young, but it is never too early to start keeping your skin in great shape for the later years! Lately, I've had some sleepless nights, and in the morning my eyes feel dry, soar, and the skin around them is looking drab and dull. Luckily, I turned to overnight eye cream, which not only helps keep eyes looking refreshed and moisturized, but all the skin around your eyes can start to feel tighter, brighter, and healthier after just a few uses. This recipe allows any essential oil for the scent, but I used, and recommend, using eucalyptus essential oil. The eucalyptus makes this similar to Vick's VapoRub, because the heavy scent can't help but make your lids start to droop. Enjoy, stay fresh, send comments! I love hearing how this works for other people.
Source: onegoodthingbyjillee.com (I adore this blog, she has amazing tips and recipes! Check it out!)
Step 1:
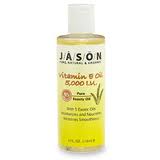
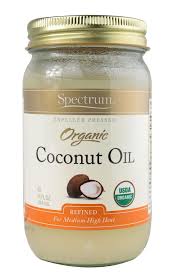
In a microwaveable measuring cup or bowl, melt 3/4 cup coconut oil for 20 to 30 seconds. Pour the oil into an empty glass jar or container. Pour in 3 tsp vitamin E oil, or if you have only the capsules, 6 capsules. Now, stir in 30 drops of any essential oil you have. Put top on to the jar.
Step 2:
Leave the jar in the fridge for about an hour, so that it is firm but still has a slight enough amount of oil to be lotioney. When you go to bed, apply the cream to your eyelids, (not eyes or inner lids/waterline!) under your eyes, and up to your crease. Enjoy!
Hello, world!
I've been so focused lately on my body lotions and eye creams lately that I have totally forgotten about my face! I was not sure about this face mask at first, because it seemed anti-all natural beauty, but I'm desperate here, people! So I broke my rule, and made a mask that uses a gel face wash. I'm not going to say that this is the most amazing blackhead extractor, but I use this as a primer for Biore Nose Strips; yet another guilty pressure that I am ashamed of but can't give up. Enjoy, stay fresh, send comments!
Source: http://www.fahv.com/how-to-get-rid-of-blackheads-on-nose-5-fast-and-easy-methods/ (They have a bunch of blackhead tips on their. Check it out!)
Hello, world!
Recently, I made the smart, but treacherous, decision to start running. Having little to no experience with this, I didn't realize the effects exercise has on your skin. Exercise is, obviously, very good for you because you are sweating out toxins in your body, but this is also good for your skin because you're still flushing grime and toxins from your pores. Unfortunately, sweat is icky and I hate it, so I found a great mask to do when I need a really deep clean. I know this is similar to my other nutmeg mask, but you can feel the difference from this mask! Exercise, stay fresh, and send your comments!
Source: babble.com
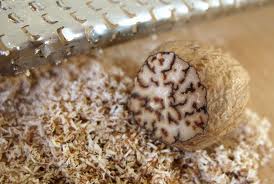 This is freshly ground nutmeg, but don't worry if you can't grind it on the spot! Jarred ground nutmeg works just as well. Step 1:
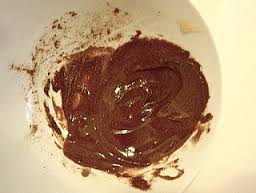
In a small bowl, combine 1 1/2 tsp of honey, 1 1/2 tsp of cinnamon, and 1 1/2 tsp of ground nutmeg. You need to keep stirring/mashing with a fork or small spatula! At first, it seems as if the honey clumps up in the middle, but I promise everything will come together quickly afterwards. It should look something like this, maybe slightly less wet:
Step 2:
You have an option here: You can wash your face with a gentle cleanser first, like Cetaphil, or, like me, you can just spread this goop all over a nasty, grimy face. I used all of it, spreading this stuff nice and thick over my whole face, especially over trouble spots including chin, forehead, and nose. Leave this on for 30 minutes, and, like I did, throw on a hair mask, too! After the 30 minutes, wash off with warm water and your hands, followed with a gentle face wash after 10 minutes. Enjoy!
Hello, world!
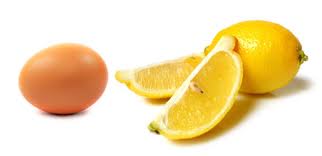
The Pampered Prep is back in action, freshly relaxed from her Labor Day free time, and ready to share with you a new face mask. The lemon juice and egg white are great drying agents, and this definitely helps clean out your skin and it absorbs any excess oil. This is a quick mask, so you can try it whenever you have around 17 extra minutes. Enjoy, leave comments, stay fresh!
Step 1:
In a small bowl, combine 1 egg white and the juice from 1 lemon. Set aside, and go wash your face. I prefer using something gentle first, like a Cetaphil, and then steaming for about 2 minutes just to open my pores up for the mask.
Step 2:
Using a brush or your clean fingers, spread the mixture over your face, making sure you have enough to cover the whole surface, especially reaching every part of your nose. Great job! Now, leave the mask on for 10 to 15 minutes. After that time is over, peel off what you can, (if any) of the mask. Wash the rest off with warm water. I immediately washed my face again with just hot water, then ice cold water to make sure my pores were closed and clean. Enjoy!
Helllllloooooooo again, world!
The Pampered Prep is back, bringing you a lemonade facial for oily, unwashed skin. But be careful, don't use this mask too often, because here's a science lesson for you: Though washing your skin and using non-oil based washes and masks may seem like a good idea, when your skin loses all of its natural oils, it kicks into overdrive, meaning that it produces more and more oil to replenish the lost oil, causing major breakouts. Always wait ten minutes after a dry mask, and let pores close before adding a light moisturizer to your skin. This mask is very simple, and only takes twenty minutes. Enjoy, leave comments, questions, anything!
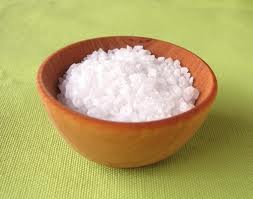
Step 1:
Wash face with warm to hot water, letting the heat open up your pores. In a small bowl, combine the juice of 1/2 lemon and one large pinch of salt. Don't try to make this a paste, leave it liquid-ey and wet.
Step 2:
With clean hands, spread the mask over your face while standing above a sink or tub to catch any drips of excess lemon juice. I left it on for twenty minutes, and it seemed like the perfect amount of time. Wash off with warm water, and dry your face, patting, not rubbing, with a soft towel. After ten minutes, apply a light layer of oil free facial lotion.
|


 RSS Feed